
Set up your store with your brand and domain
This guide shows you how to put your brand on the Unitward store and the Unitward panel, and how to point your own domain at them. You do this in Settings > Branding Settings. Some later screens, such as the store customization panel or a live storefront, may not be ready yet. Follow the steps you can complete, and write to support if a screen does not open.
Before you start
- An active Unitward reseller account.
- Your logo file, if you want to upload one (a PNG with a transparent background works well).
- Access to the DNS settings for your domain, if you want to use your own name.
Step 1Open Branding Settings
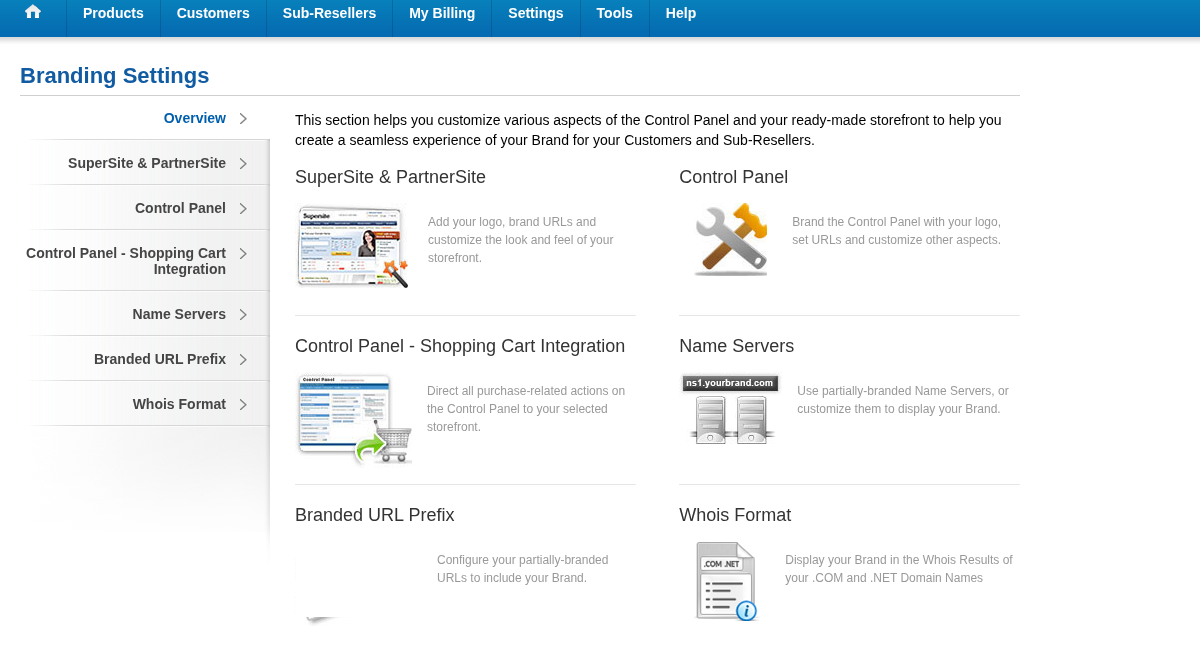
Sign in to the Unitward panel. Open Settings, then Branding Settings. The overview shows SuperSite & PartnerSite (your storefront), Control Panel and other branding options.
Step 2Open the SuperSite 2 customization panel if it is available
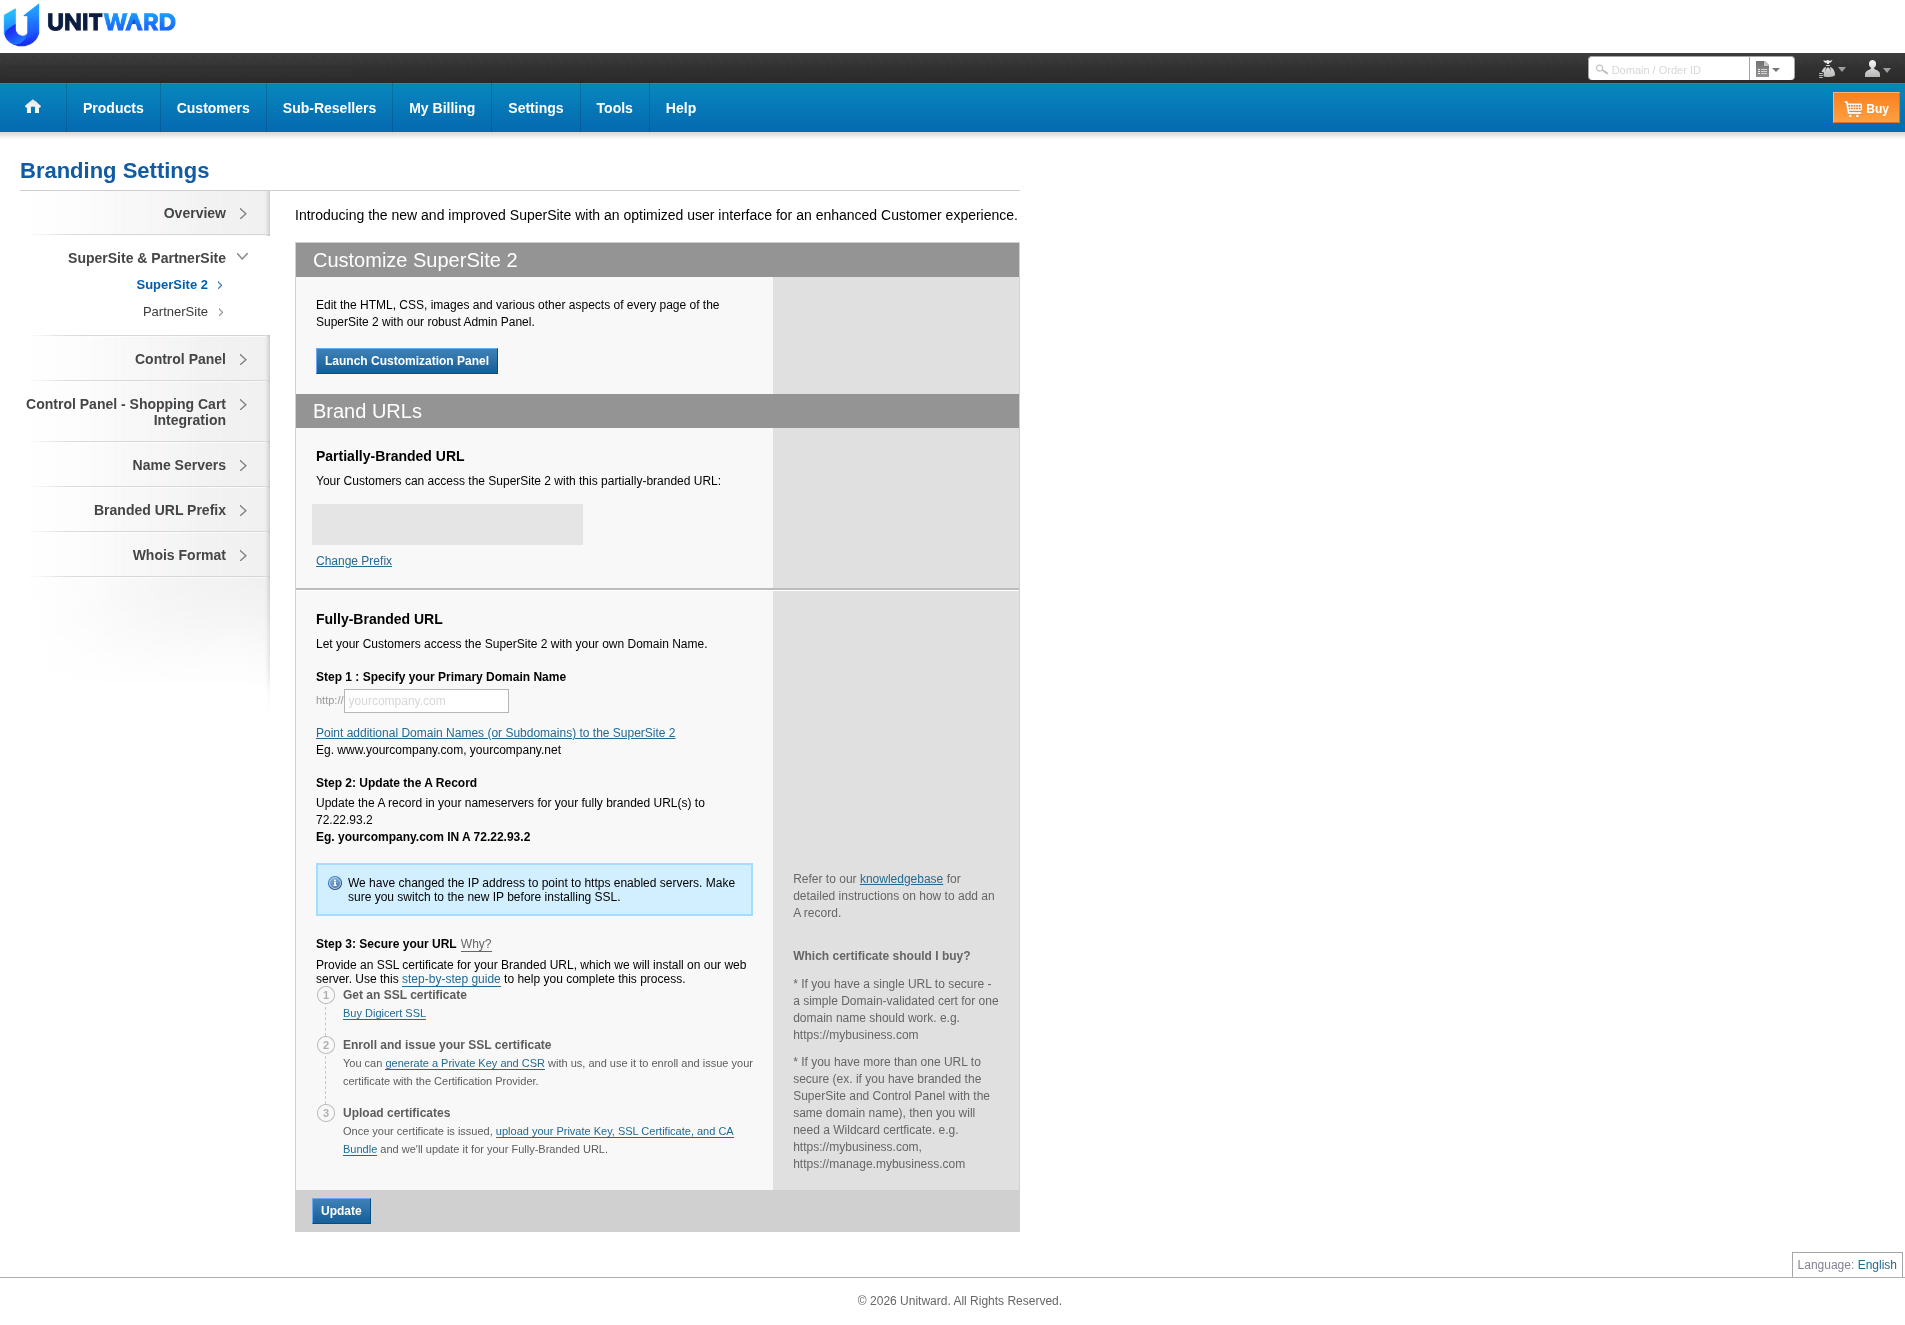
In the left menu, open SuperSite & PartnerSite, then SuperSite 2. To customize the look of your store, click Launch Customization Panel.
If the customization panel opens, use it to set your store logo and basic appearance. If it does not open, skip this step for now and write to [email protected].
Step 3Set your SuperSite 2 store domain
Under Brand URLs, the page shows a temporary store address. Click Change Prefix if you want to change that prefix.
To use your own domain, go to Fully-Branded URL and follow the steps on the page:
- Step 1: Specify your Primary Domain Name. Enter your domain, for example yourcompany.com.
- Step 2: Update the A Record. In your domain's DNS, create an A record that points to 72.22.93.2. The example on the page is: yourcompany.com IN A 72.22.93.2. The page also says to switch to the new IP before you install SSL.
- Step 3: Secure your URL. Provide an SSL certificate for your branded URL. On this page you can Get an SSL certificate, Enroll and issue your SSL certificate (you can generate a Private Key and CSR) and Upload certificates. Then click Update.
Step 4Set your PartnerSite domain
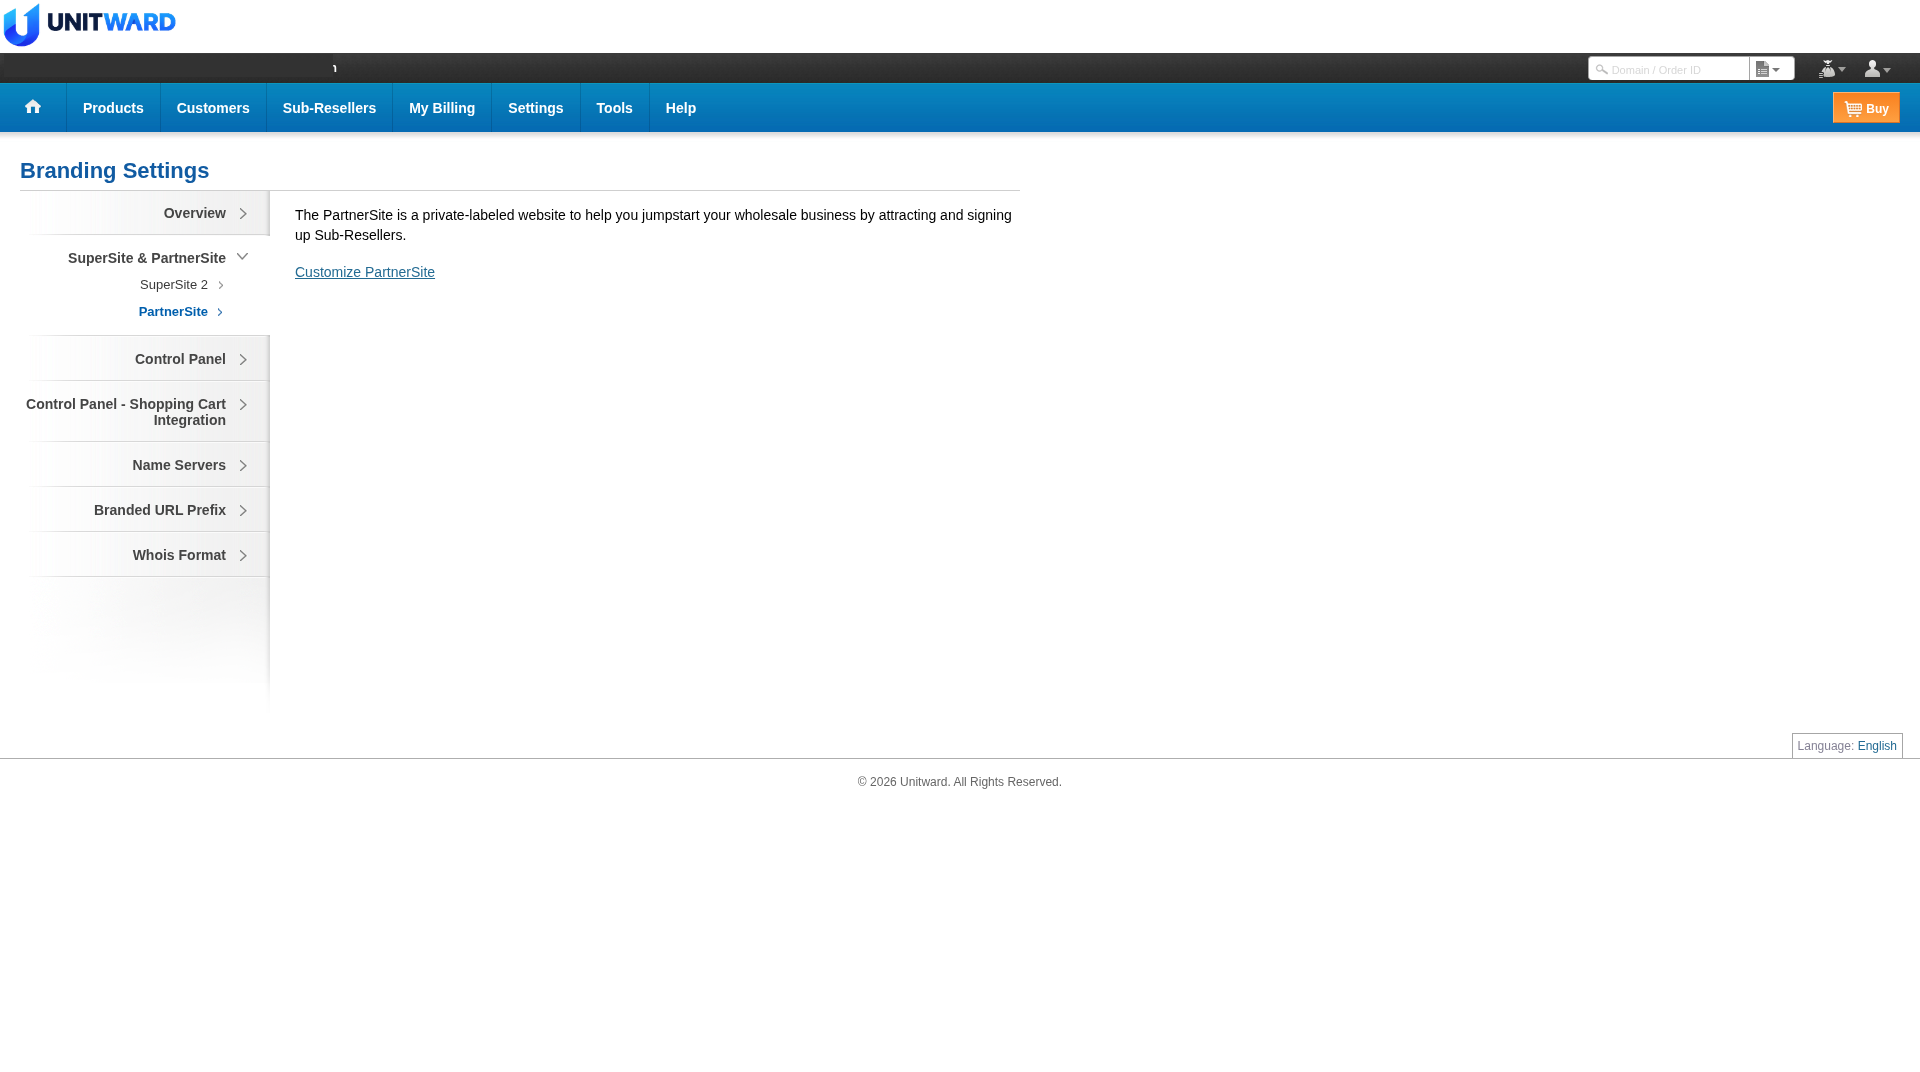
If you also use PartnerSite, open SuperSite & PartnerSite, then PartnerSite. Click Customize PartnerSite to open its options, or click Launch Customization Panel on that page if it is available.
Step 5Point PartnerSite at your domain
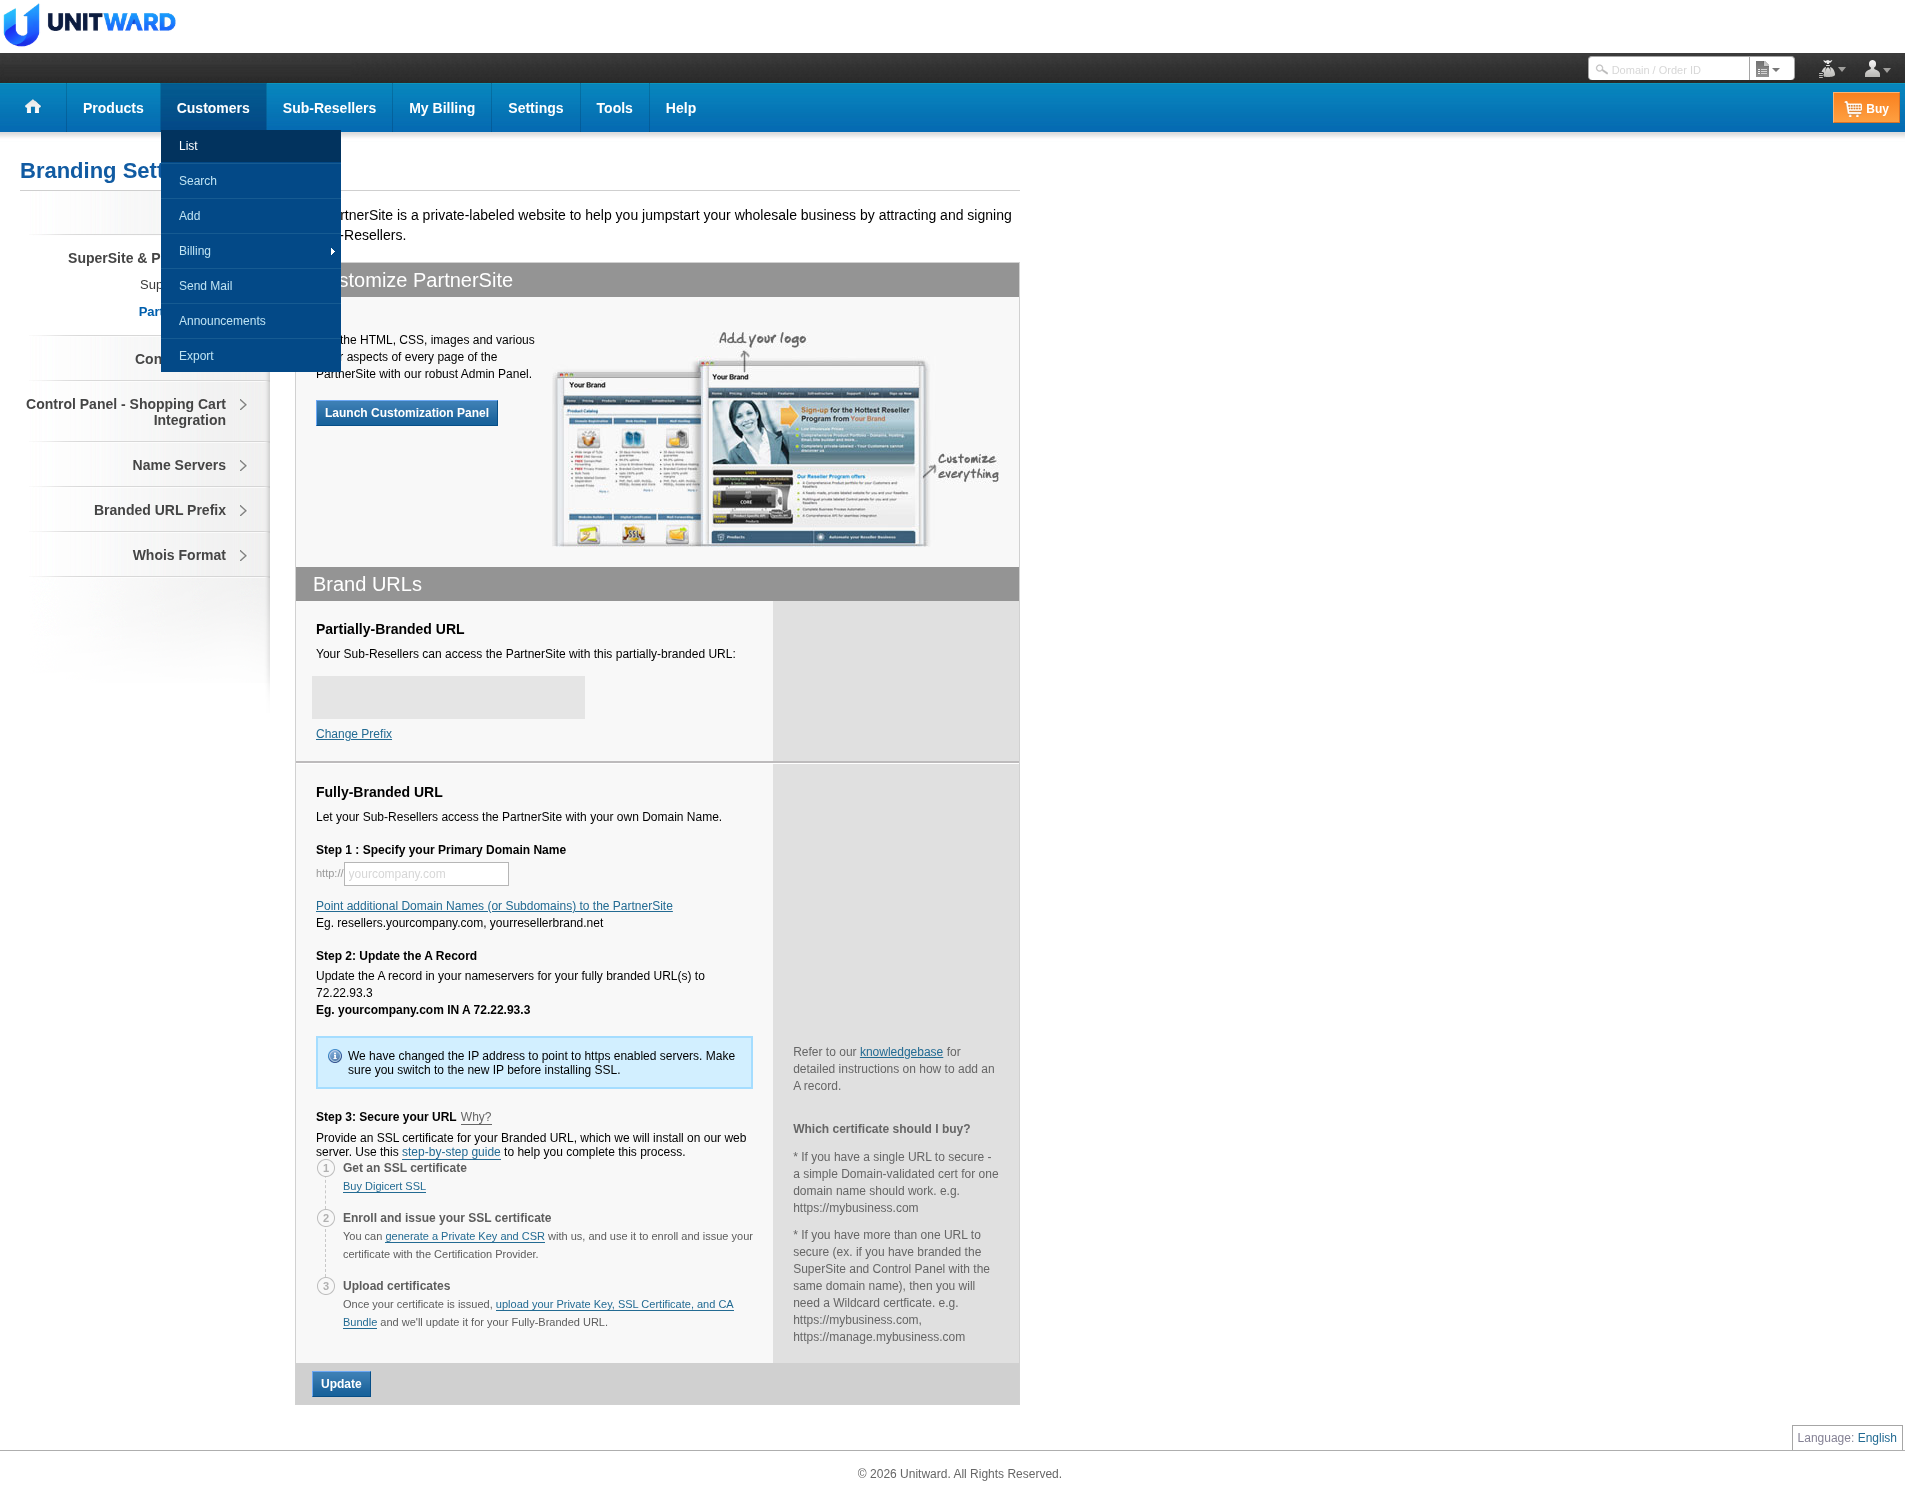
To use your own domain for PartnerSite, go to Brand URLs and follow Fully-Branded URL. In Step 2: Update the A Record, create an A record that points to 72.22.93.3. The example on the page is: yourcompany.com IN A 72.22.93.3. Step 3: Secure your URL uses the same SSL steps as SuperSite 2. Click Update when you are done.
The Home page may also show a yellow Update Required banner with both IP addresses: SuperSite 72.22.93.2 and PartnerSite 72.22.93.3.
Step 6Upload your logo to the Unitward panel
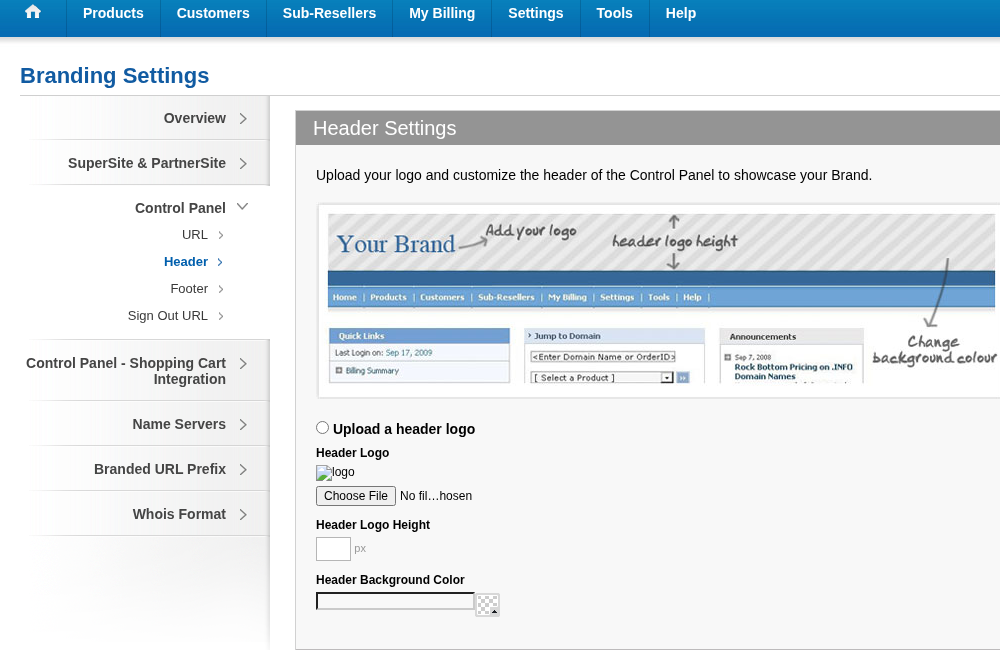
In Branding Settings, open Control Panel, then Header. Choose Upload a header logo, click Choose File and select your logo. Set Header Logo Height if needed, and set Header Background Color if you want. Then click Update.
Step 7Use your own domain for the panel
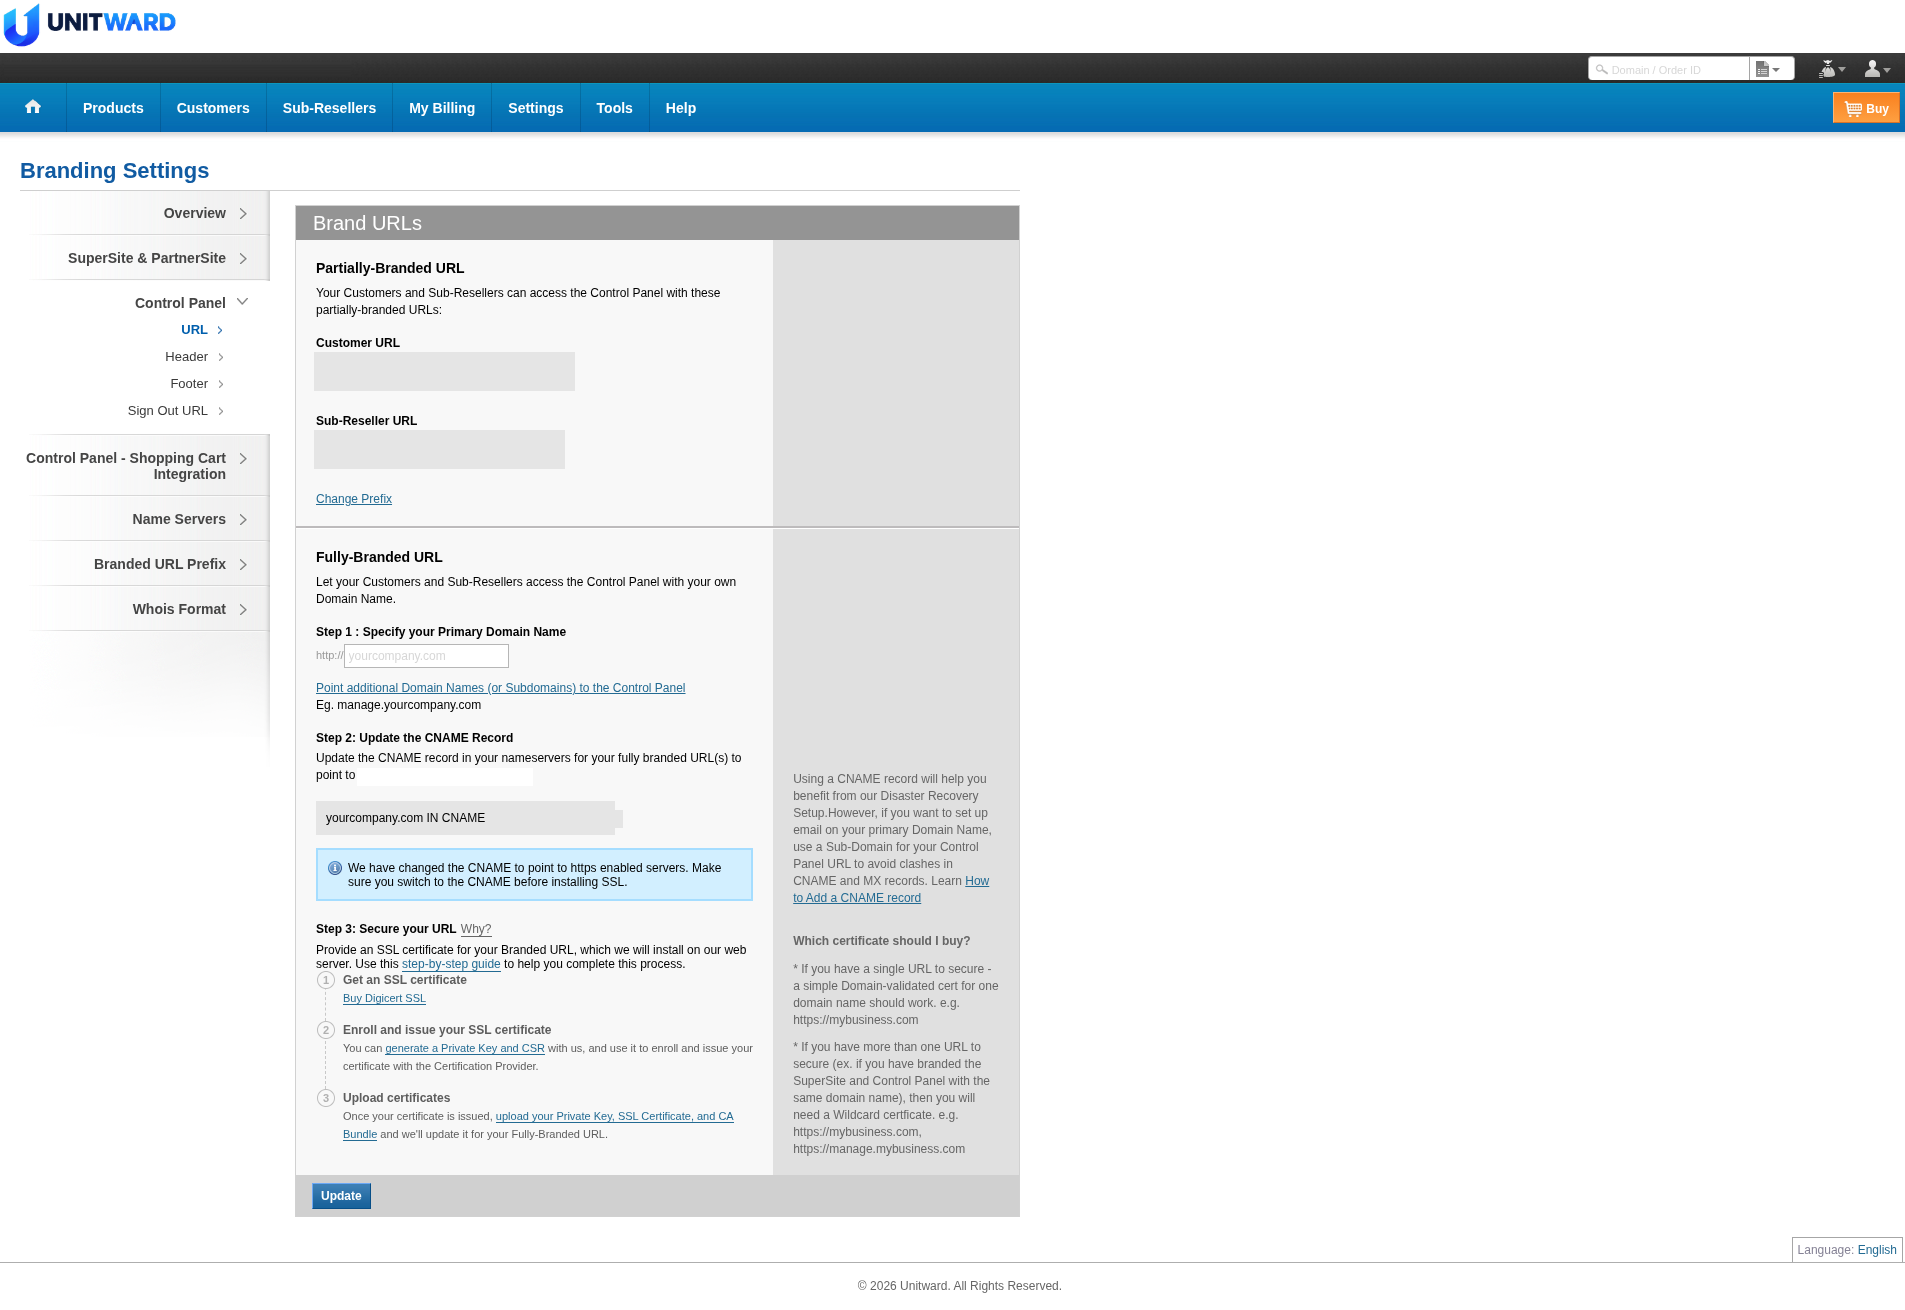
To use your own domain for the Unitward panel, open Control Panel, then URL.
- Under Fully-Branded URL, enter your panel hostname in Step 1: Specify your Primary Domain Name.
- In Step 2: Update the CNAME Record, create a CNAME record for that hostname and set the CNAME value to cp-2.myorderbox.com. The example on the page is: yourcompany.com IN CNAME cp-2.myorderbox.com. The page says to switch to this CNAME before you install SSL.
- Use a hostname that is different from your SuperSite and PartnerSite domains. If your email (MX) uses the root domain, use a subdomain for the panel, such as manage.yourcompany.com.
- Step 3: Secure your URL uses the same SSL steps as the store domains. Click Update.
Step 8Reload the store cache
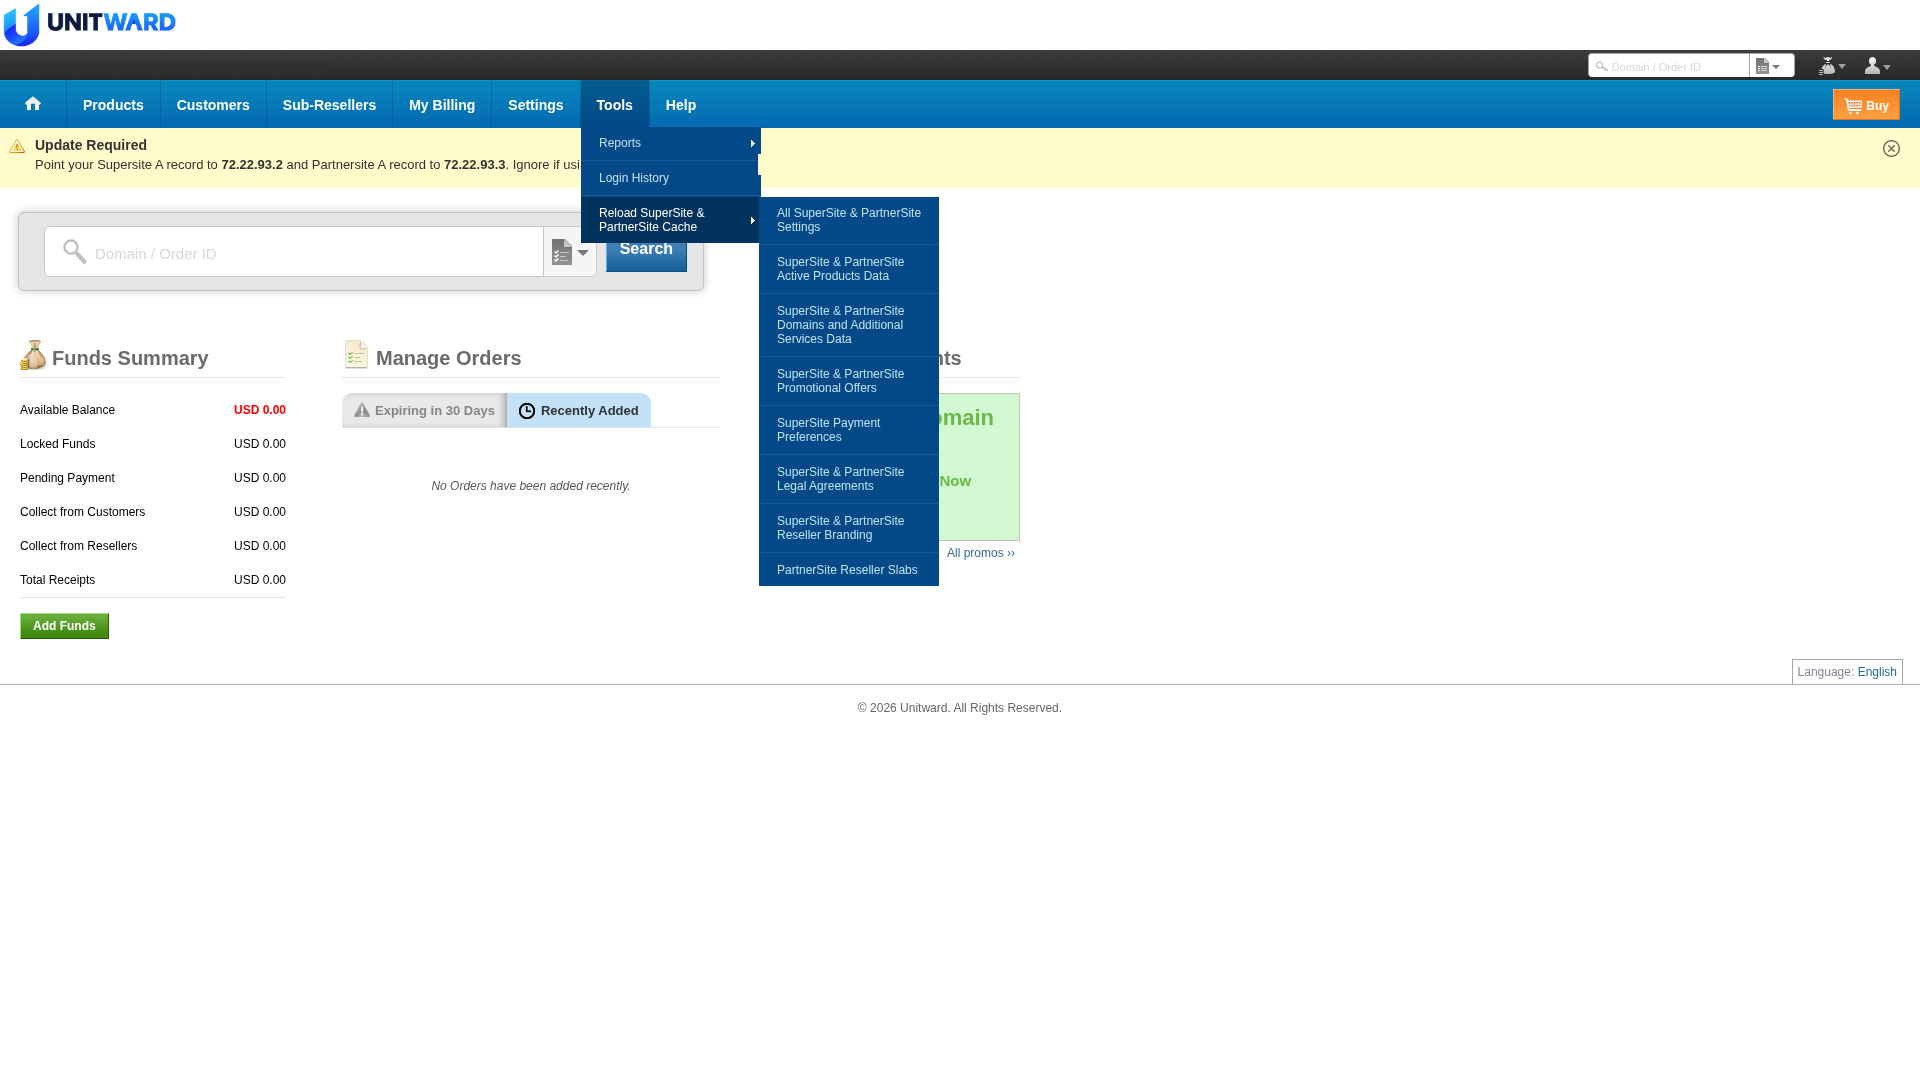
After you change branding or store settings, reload the cache: open Tools, then Reload SuperSite & PartnerSite Cache. Choose what to reload. For a full refresh, choose All SuperSite & PartnerSite Settings, then confirm that the reload completed.
Step 9Check your store when it is online
Wait for DNS to update, then try opening your domain in a browser and see whether the store loads with your brand. If the store is not ready yet, write to [email protected].
✅ Your branding settings are in place
SSL and DNS can take a little time to update. If your store or a customization screen is not ready yet, write to [email protected].